


I’ve been baking sourdough for a few years now & just LOVE it compared to store bought bread. It’s also WAY cheaper! Since being quarantined for COVID19, I’ve started talking all things sourdough on my Instagram & there are so many questions! yay! I thought a blog post with alllll the info would be helpful! I’ll be talking about regular white & gluten free starter. Anything regarding gluten free will specifically be started gluten free because it’s very different than baking gluten sourdough. If you’re not familiar at all with sourdough baking, I suggest making yourself a little familiar by browsing King Arthur’s website. It has so much helpful info & will give you a good base of knowlage.
Now, quick disclaimer….I’m in NO WAY a baking expert! I’m just sharing what I do & what works for me. Who even knows if the way I bake sourdough is the ‘right’ way to do it! But it works well for me & it’s so easy once you get it down. I’ll start from the basics…
THE STARTER
In order to bake sourdough, you’ll need a starter. You can either start your own at home (long process) or you can get some from a friend! A starter is basically fermented water & flour. If you want to start your own at home, I recommend this one from King Arthur. If you get some from a friend, it’s quicker & easier to get to baking right away
FEEDING YOUR STARTER
Once your starter is ready to use, you’ll need to keep it ‘alive’ by feeding it regularly. If you have a regular gluten starter, you’ll need to feed it 2 parts flour, 1 part water. For example, if you have 1 cup of starter, you’ll want to feed it 2 cups flour & 1 cup water. For a gluten free brown rice flour starter, you’ll want to feed it 1/2 cup of brown rice & 1/2 cup of filtered water. I keep both my gluten & gluten free starter in the fridge and feed them about once every 2 weeks or before I go to bake (which is about once a week). By feeding you starter, it grows in quantity, so if you’re wanting to bake a lot, you can build it up quite a bit for however much you need (depends on the recipe).
WHERE TO KEEP YOUR STARTER
I believe traditionally, you’re supposed to keep your starter on the counter & feed it everyday. But in my opinion, that is a LOT of flour to constantly have on hand to feed it & you’d be throwing away so much starter as it grows! When I first started, I had like 12 cups of starter at one time. YIKES! So all that to say, I keep my starters in the fridge which put your starter to ‘sleep’ and slow the fermentation process down so you don’t have feed it as often. I keep both my starters in glass jars with the lid on loosely to allow some air flow. But when you keep starter in the fridge, you can’t pull it out to bake with it right away because you can’t bake with cold starter. You’ll need to ‘wake it up’ by feeding it & keeping it on the counter for at least 24 hours.
WHEN YOU WANT TO BAKE
So when I want to bake, I prepare a day or two in advance by pulling my starter from the fridge, putting it ALL in a bigger container, feeding it, and letting it sit on the counter until it gets bubbly & active again…which is usually a day or so. When you keep your starter on the counter, it does need to be fed once a day. But don’t feed it the day you’re going to bake it. If your house is cold, it will take longer to reactivate. You’ll know when your starter is ready to bake when it’s really bubbly & active. Or you can use the ‘float test’ for your gluten starter…I don’t use this method, but people I know do!
GLUTEN FREE TIPS
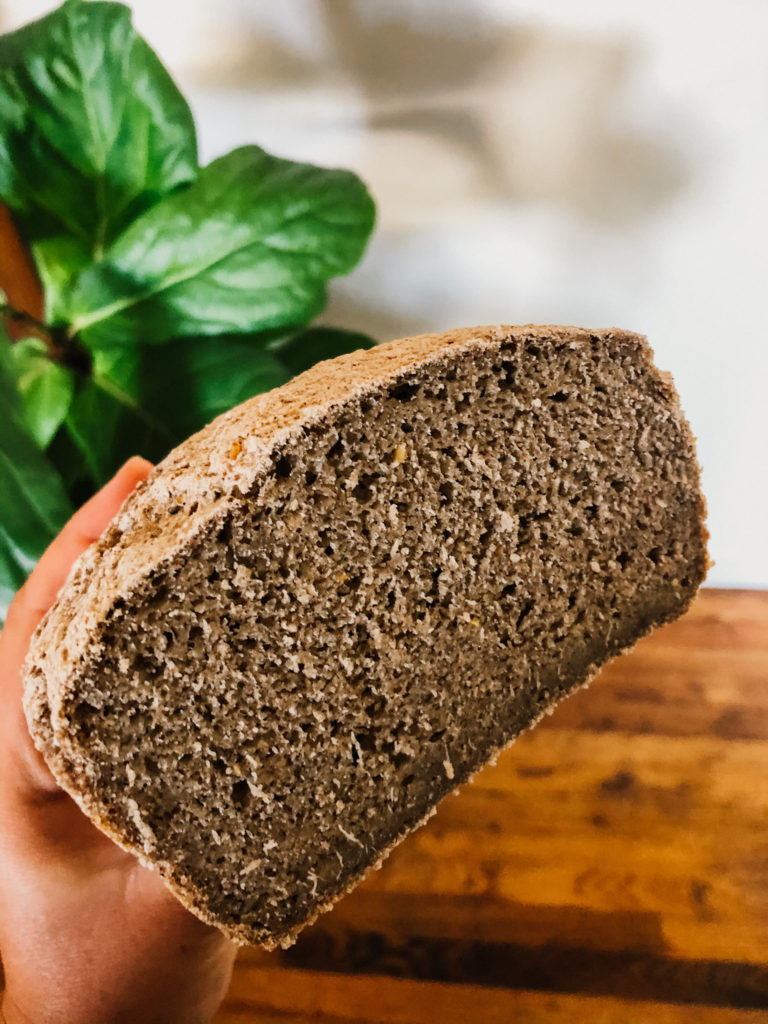
Baking gluten free sourdough is nothing like gluten sourdough. It’s a little more complicated but oh so worth the reward! You can’t 1:1 substitute GF starter for a gluten recipe. It just doesn’t work the same & I’ve failed MANY times. Follow specific GF recipes closely for the best results.
HELPFUL KITCHEN TOOLS
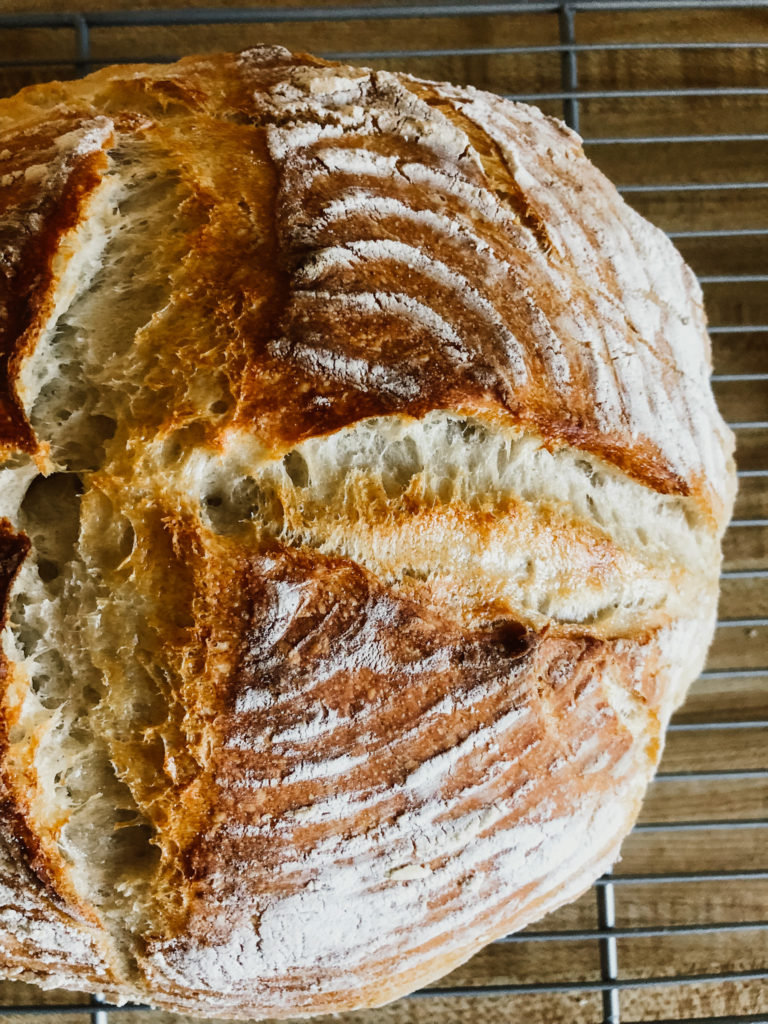
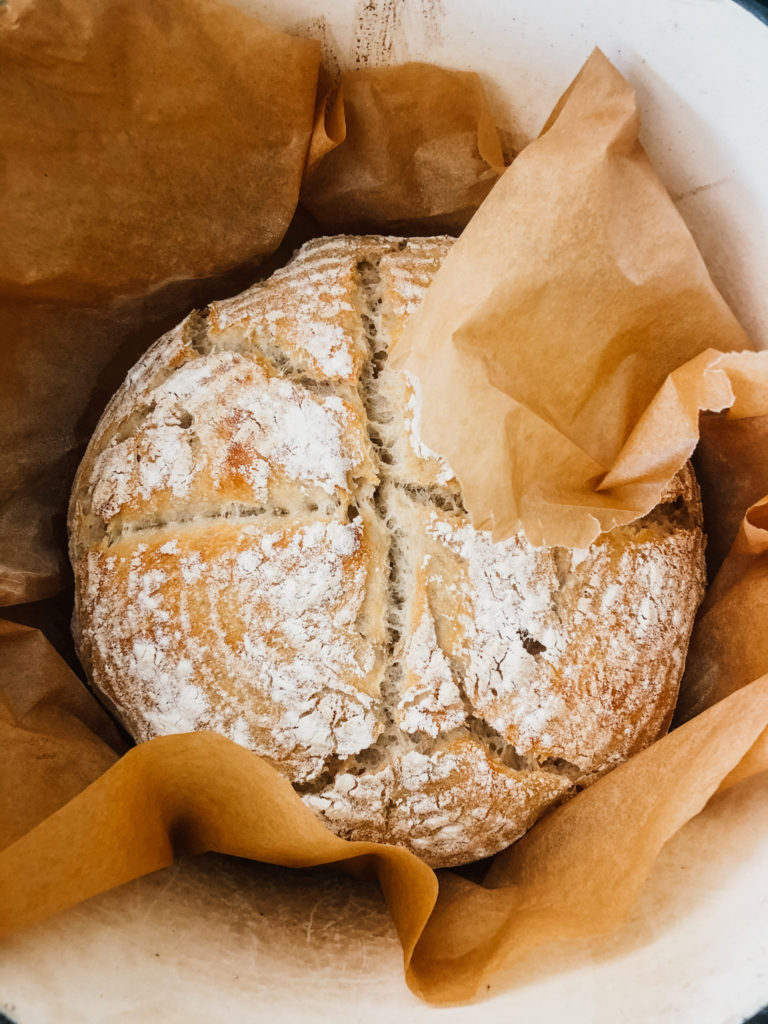
To make the beautiful round artisan loaves, you’ll need a cast iron dutch oven. I haven’t had success with a round artisan loaf any other way. A proofing basket is fun but totally not necessary! It allows for a great shape & also those pretty round rings in your bread. I don’t use one for my gluten free baking because with gluten free, it helps to transfer as little as possible. Having a dough hook on your kitchen aid will be helpful with the kneading & mixing, but you don’t ‘need’ it. And when you see all those pretty designs on the top of loaves, that’s done with a scoring tool!
MY FAVORITE RECIPES
I have a whole Pinterest board that I’m always updating with all my favorite recipes or ones I want to try in the future. But I’ll link frequent favorite recipes here too:
Easy Sandwich Loaf
Best Artisan Loaf
Extra Tangy Long Proof
Easy Pizza Crust
Sourdough Crackers
Best Gluten Free Sourdough (I sub arrowroot powder for corn starch & I put the loaf to proof right in a butter greased (oil doesn’t work well) loaf pan & let it rise the whole time in the loaf pan & then bake it in that pan! Less touching I have found it turns out better.)
Gluten Free Pizza Crust


liked this post? leave a comment!